- Creating an Order
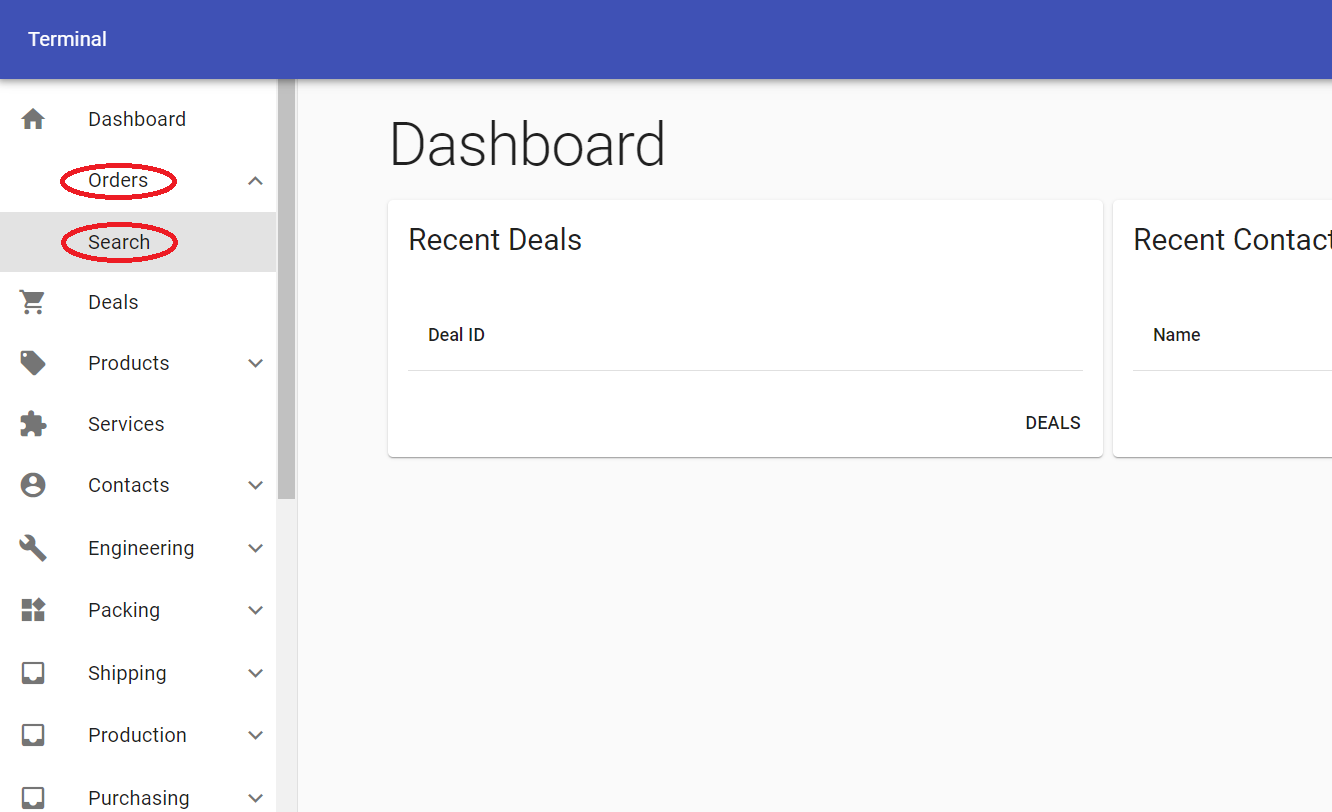
- On the left-side menu, click on “Orders”, then click on “Search”.
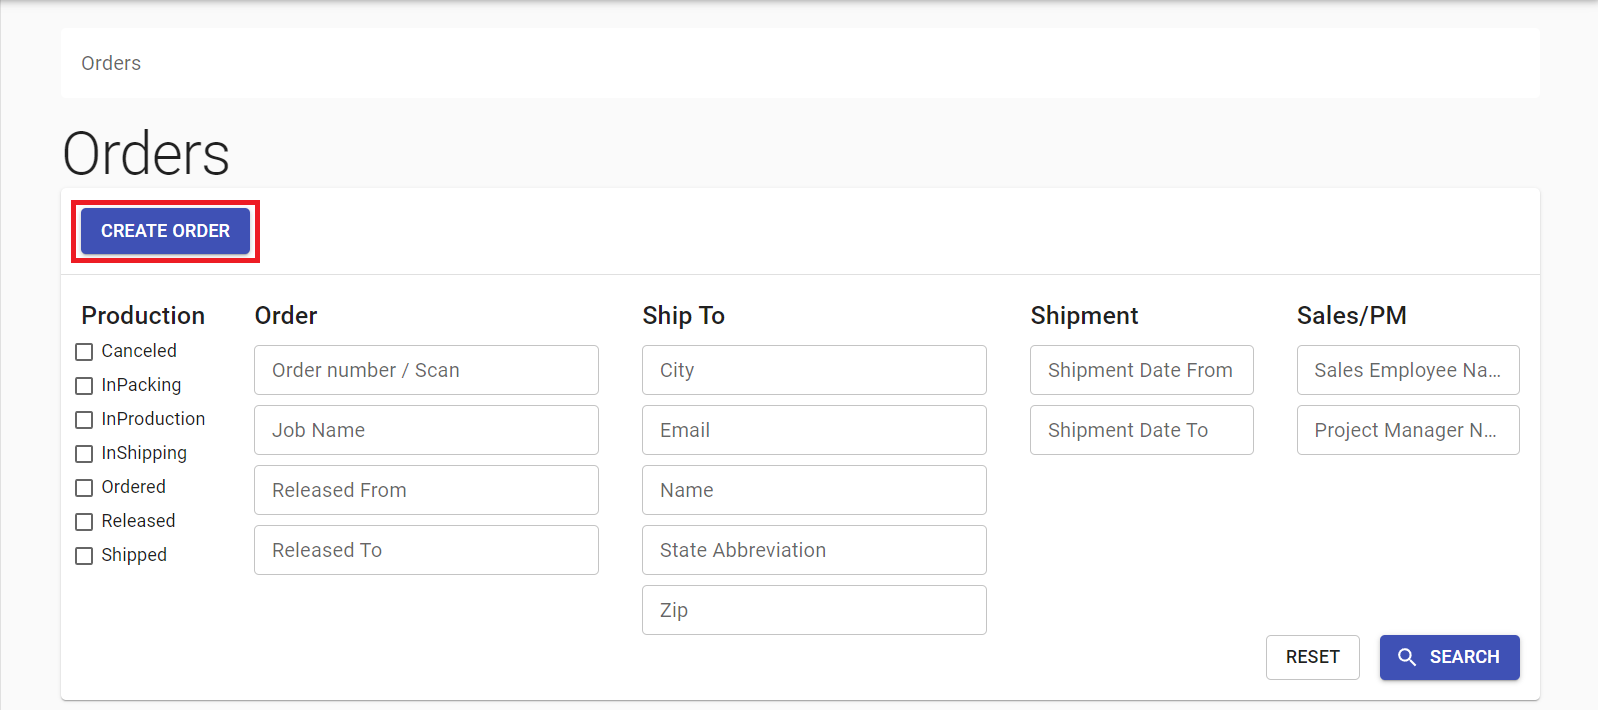
- Click on the “CREATE ORDER” button.
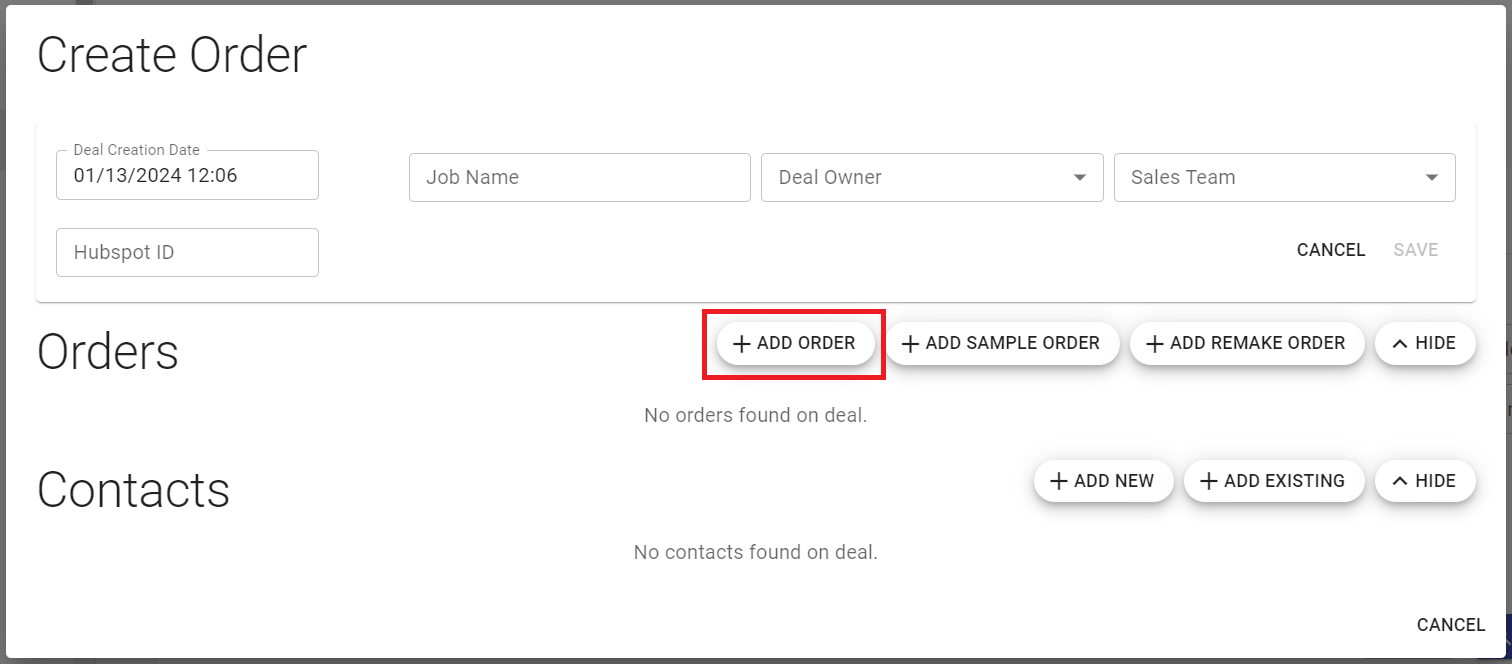
- Click on the “ADD ORDER” button (order will be created).
- On the left-side menu, click on “Orders”, then click on “Search”.
- Adding a Job Name
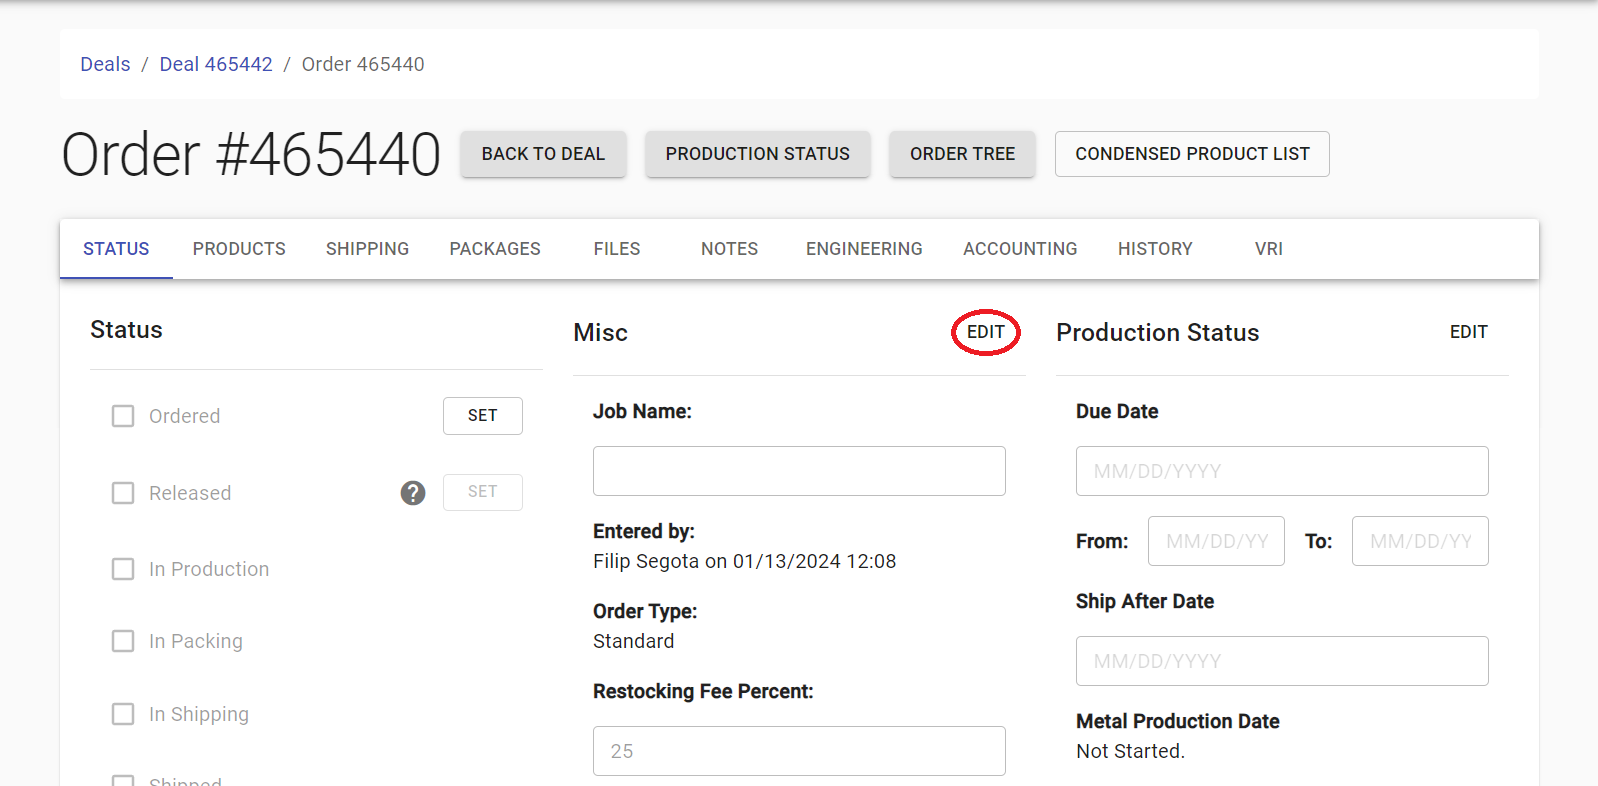
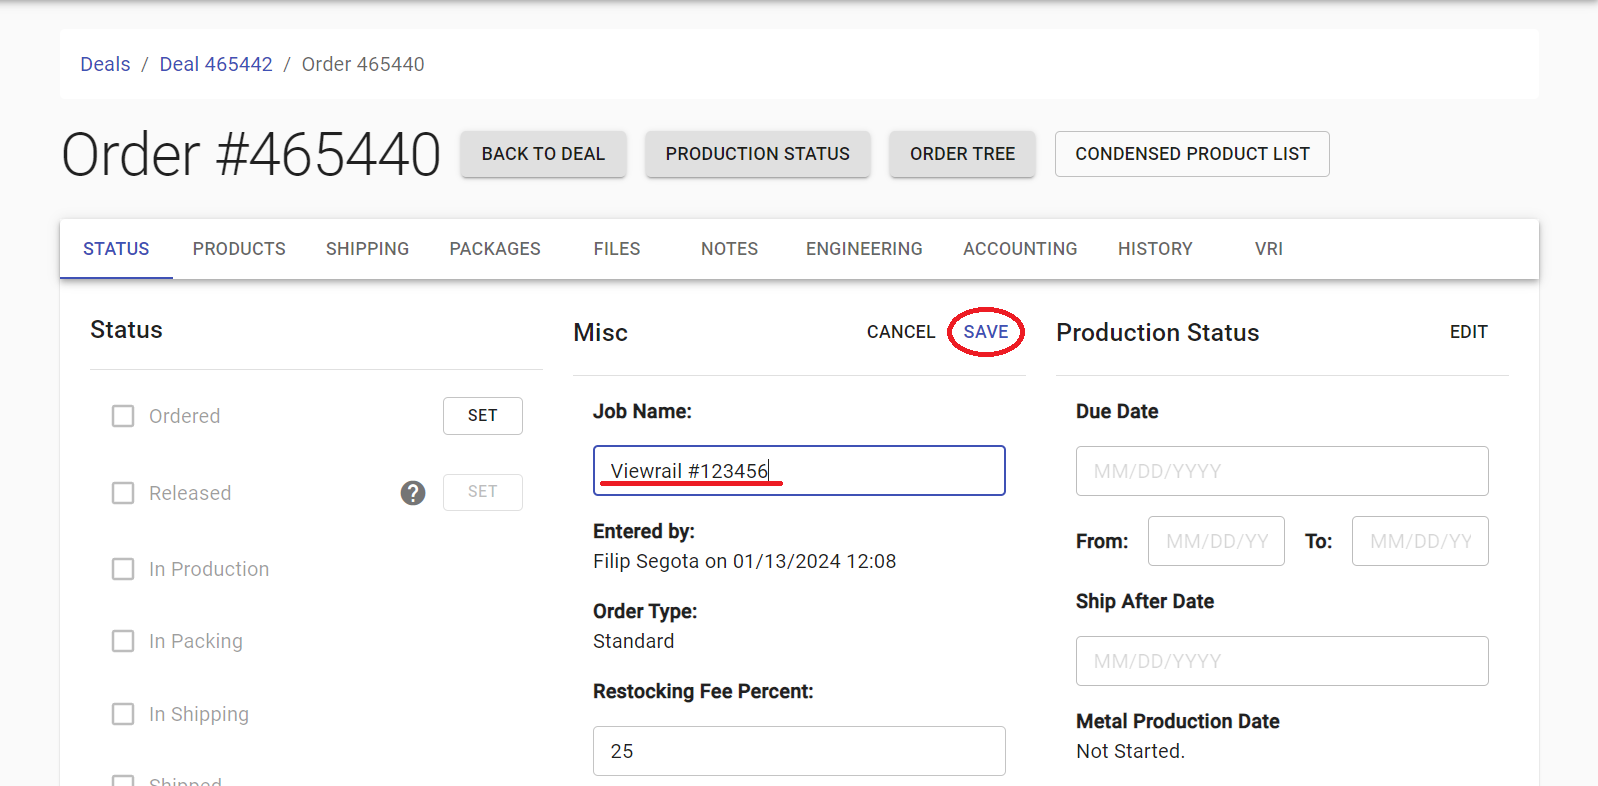
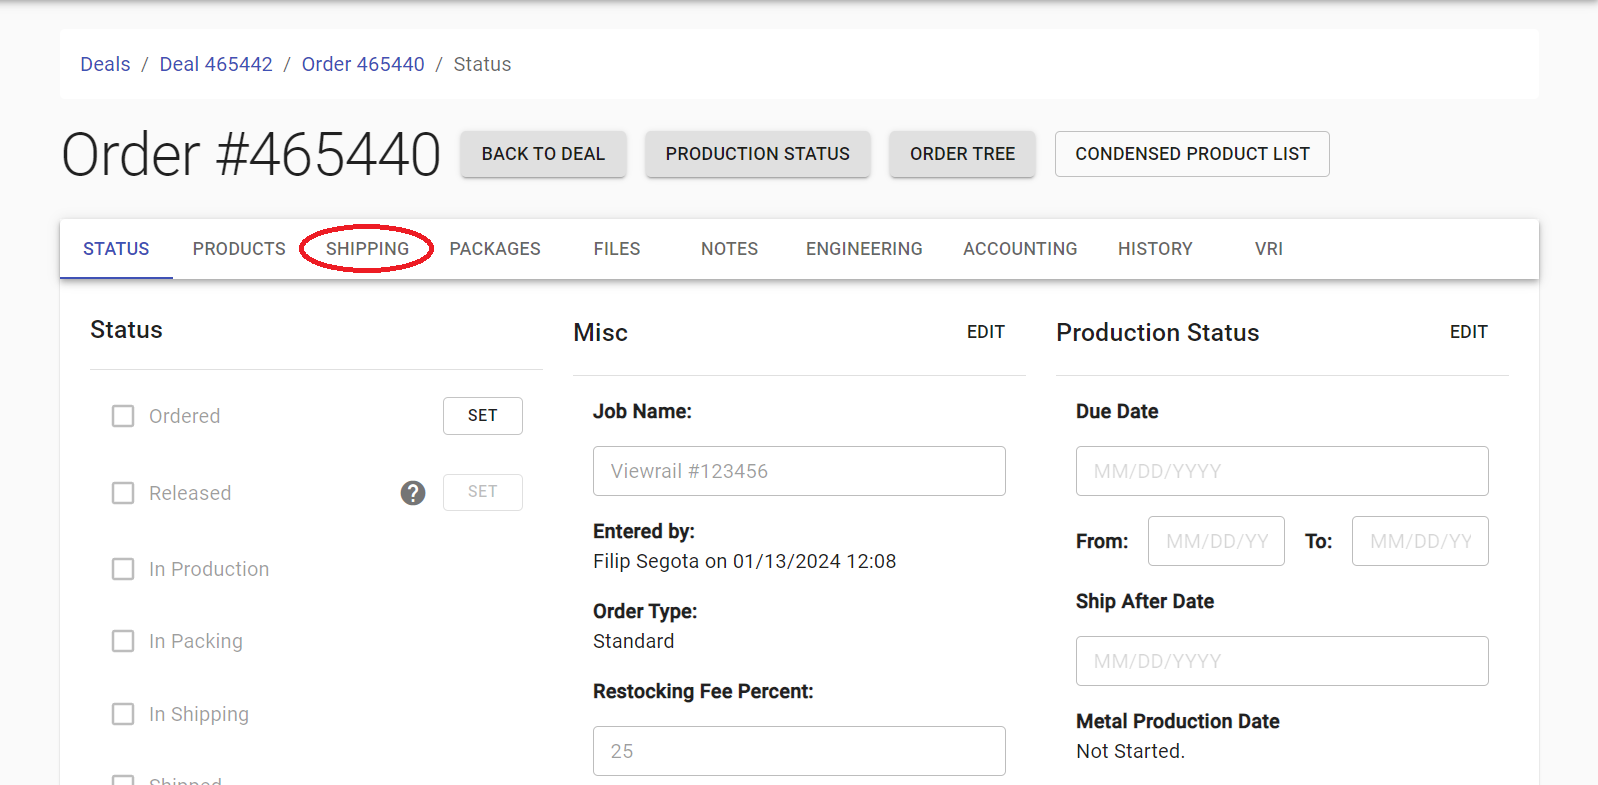
- Click on “EDIT” next to the “Misc” section.
- Type in the job name and click on “SAVE” to save it.
- Click on “EDIT” next to the “Misc” section.
- Adding Products
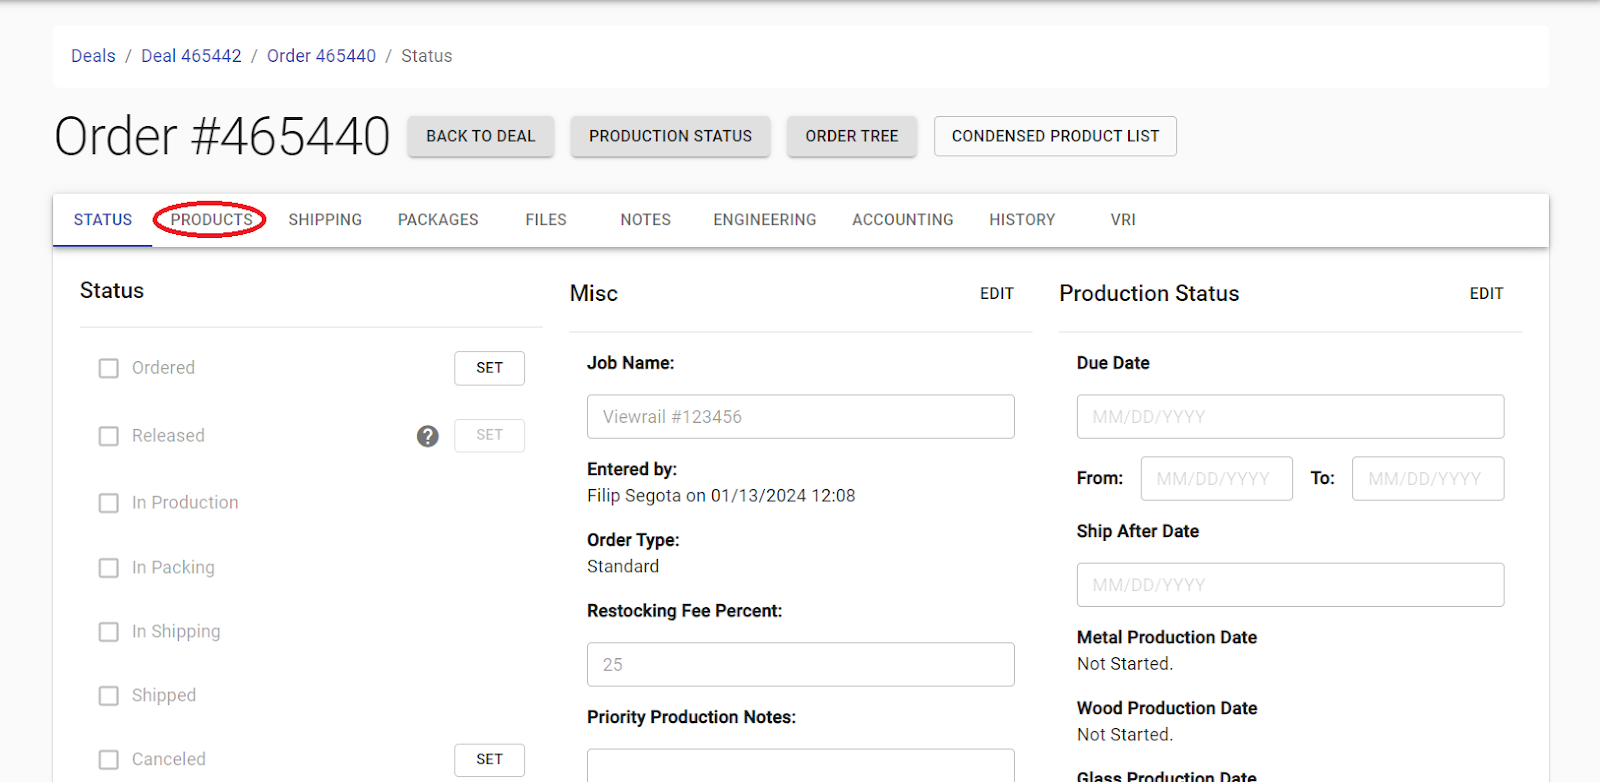
- Click on the “PRODUCTS” tab.
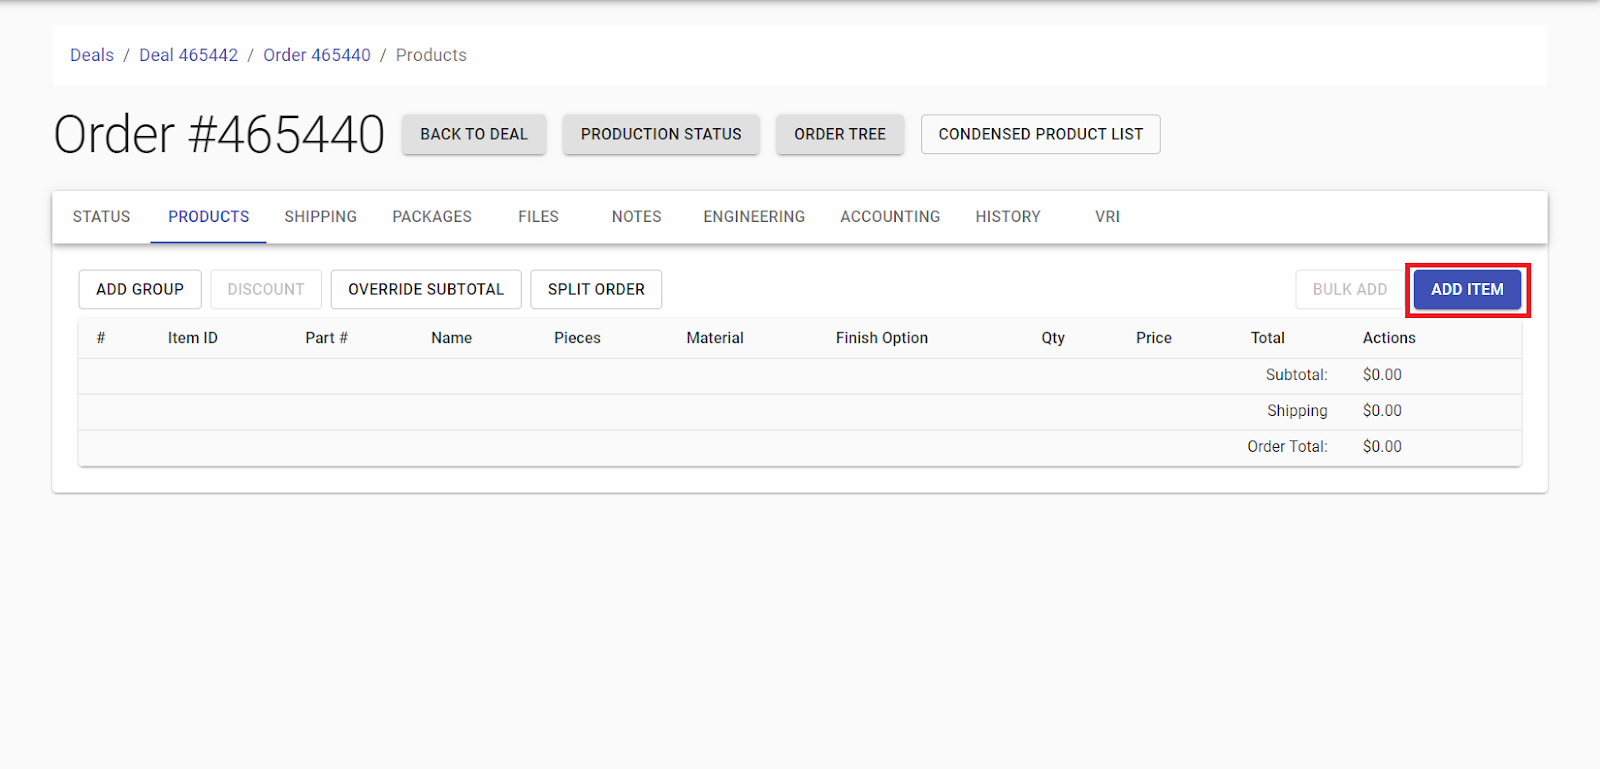
- Click on the “ADD ITEM” button.
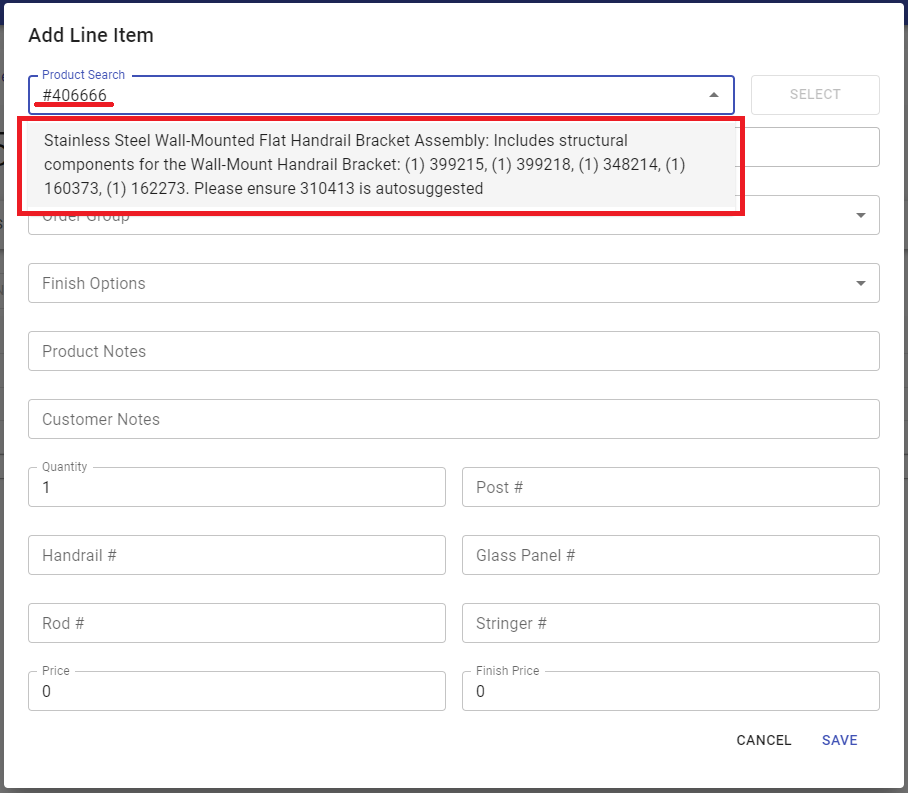
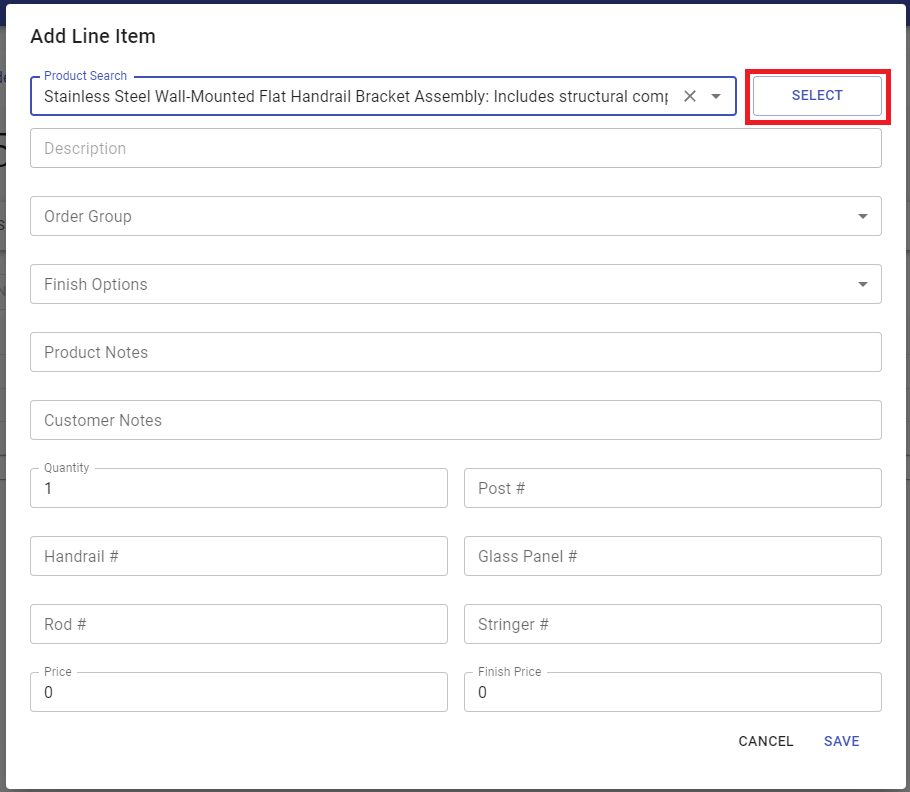
- Search for an item you want to add by typing it in the “Product Search” field (you can search by ID number or the item name). The dropdown menu will show matches for your search. Click on the item you want to add from the dropdown menu.
- Click on the “SELECT” button to select that item.
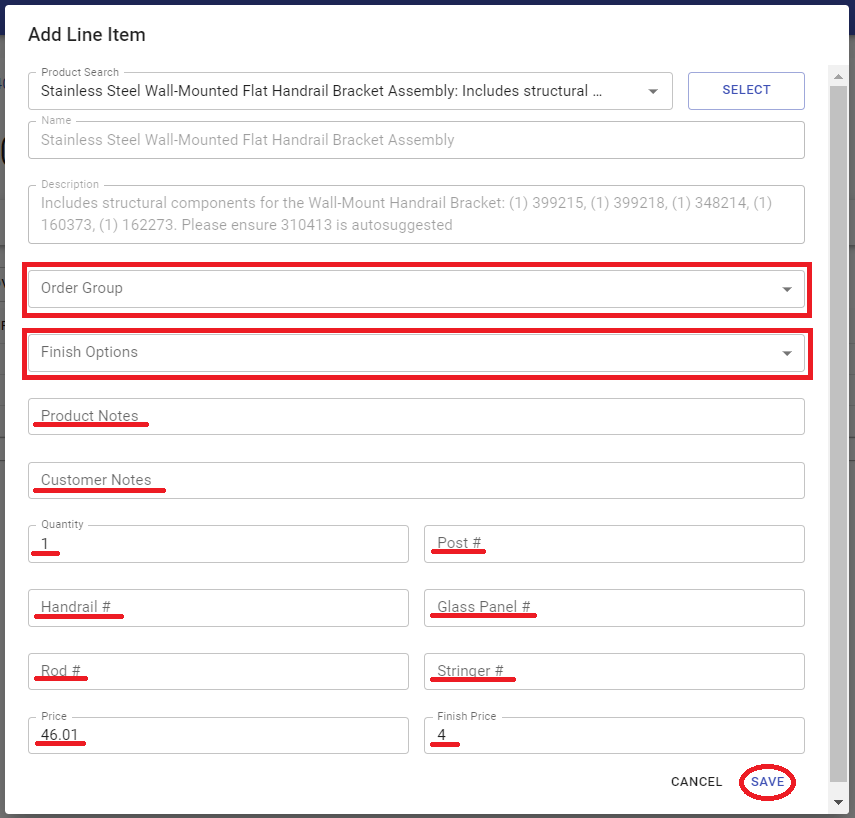
- Add needed information about the item (such as quantity, price, finish, etc.), then click on “SAVE” to save that item.
- Click on the “PRODUCTS” tab.
- Editing or Deleting Items
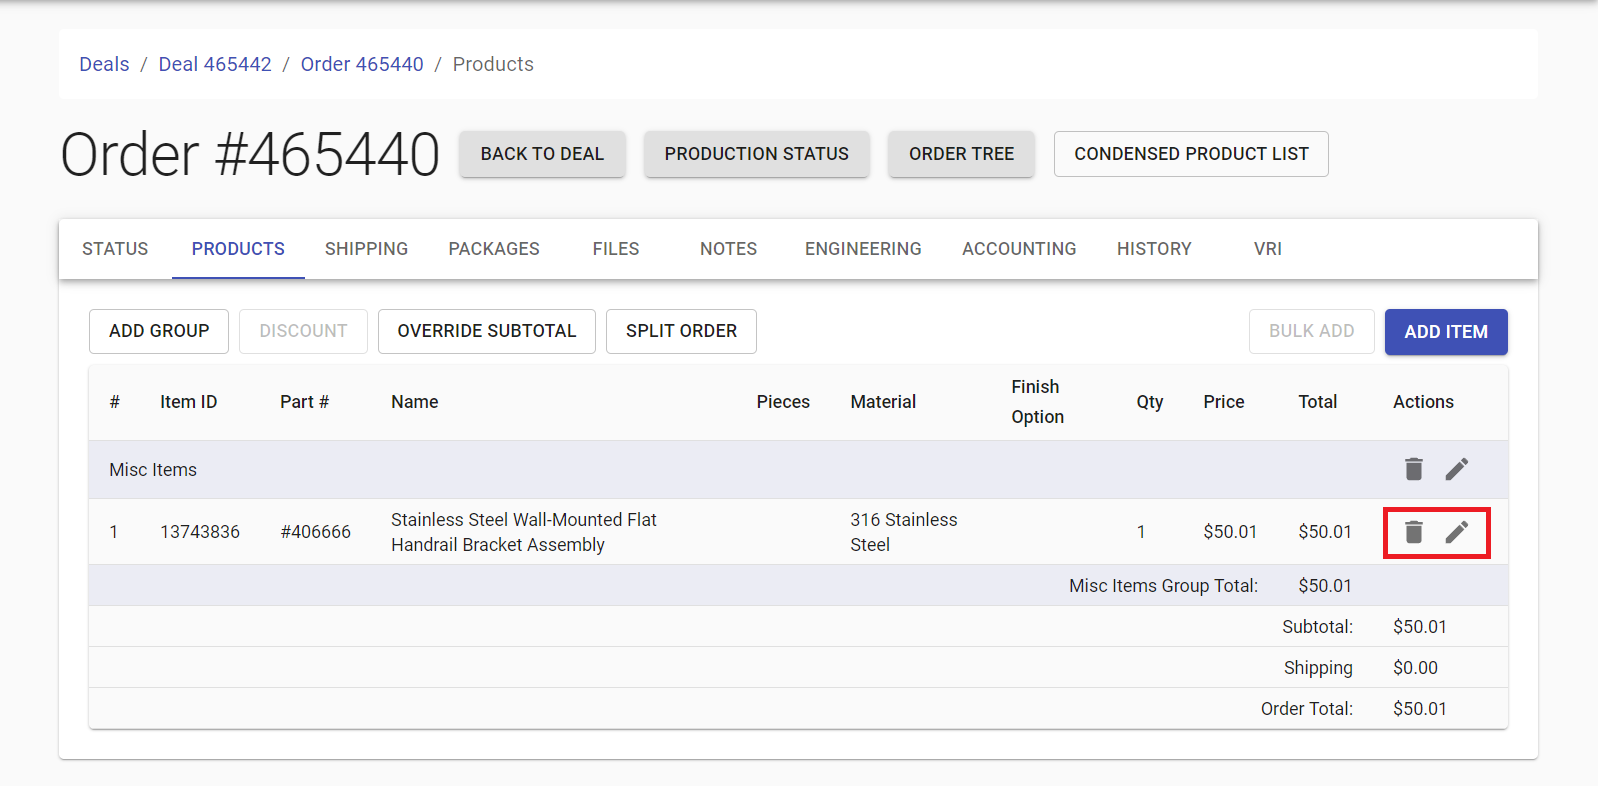
- In the “PRODUCTS” tab, you can see the list of all the added items. You can delete an item by clicking on the
icon, or edit an item by clicking on the
icon.
- In the “PRODUCTS” tab, you can see the list of all the added items. You can delete an item by clicking on the
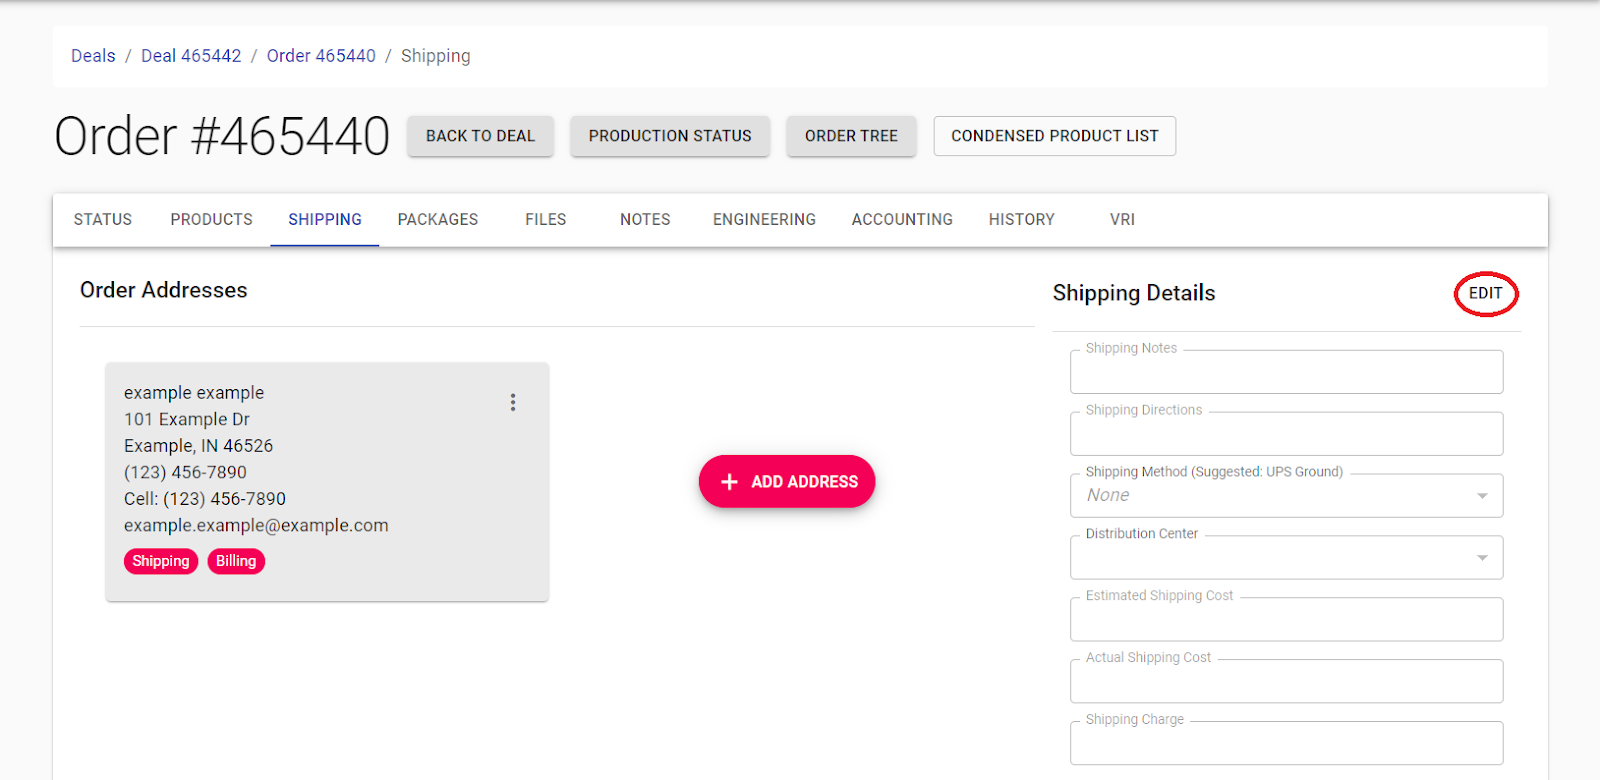
- Adding an Address
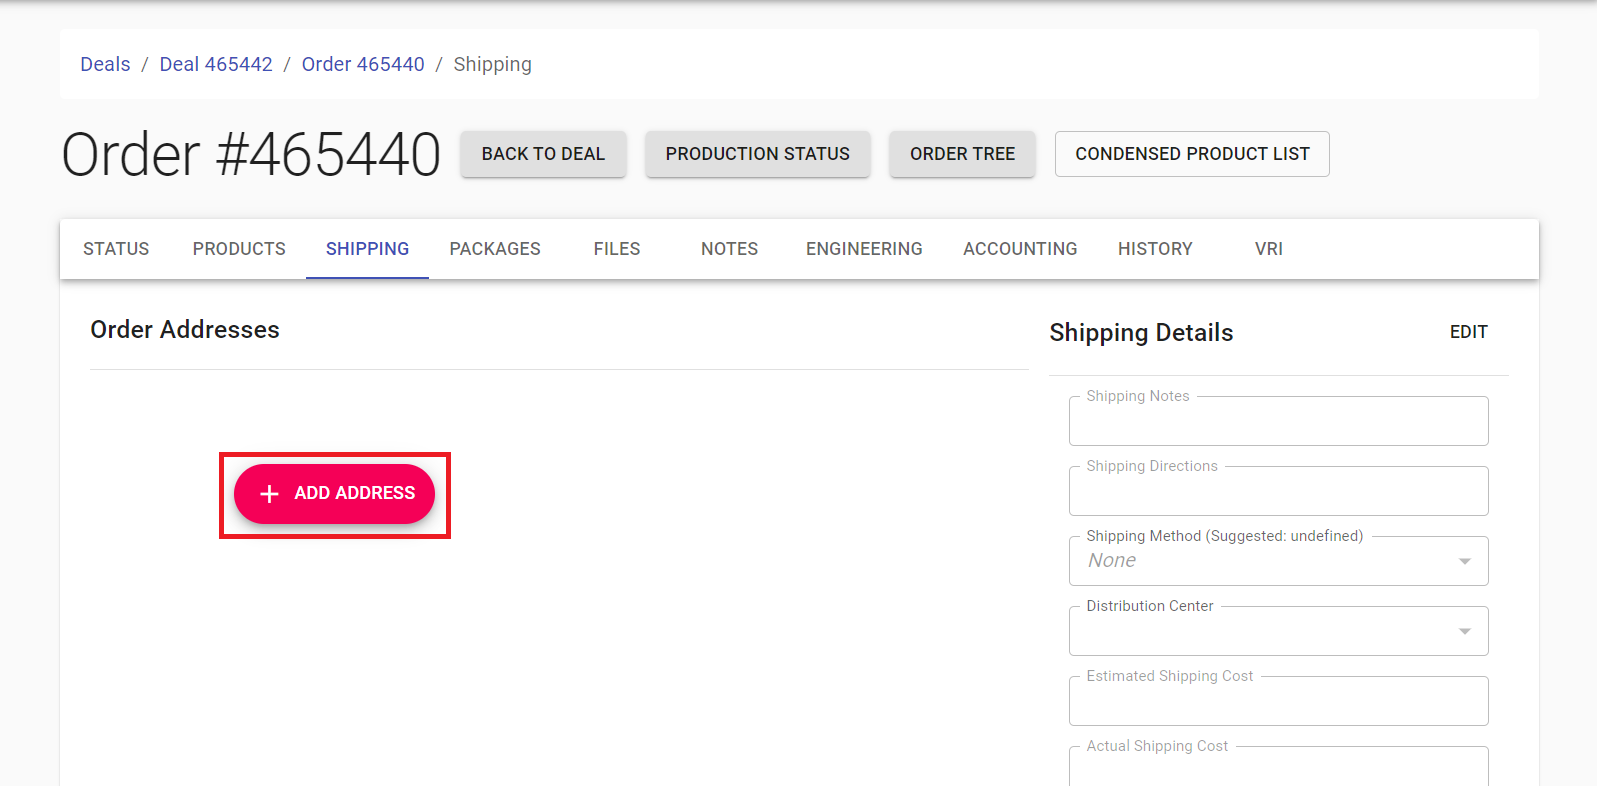
- Click on the “SHIPPING” tab.
- Click on the “+ ADD ADDRESS” button.
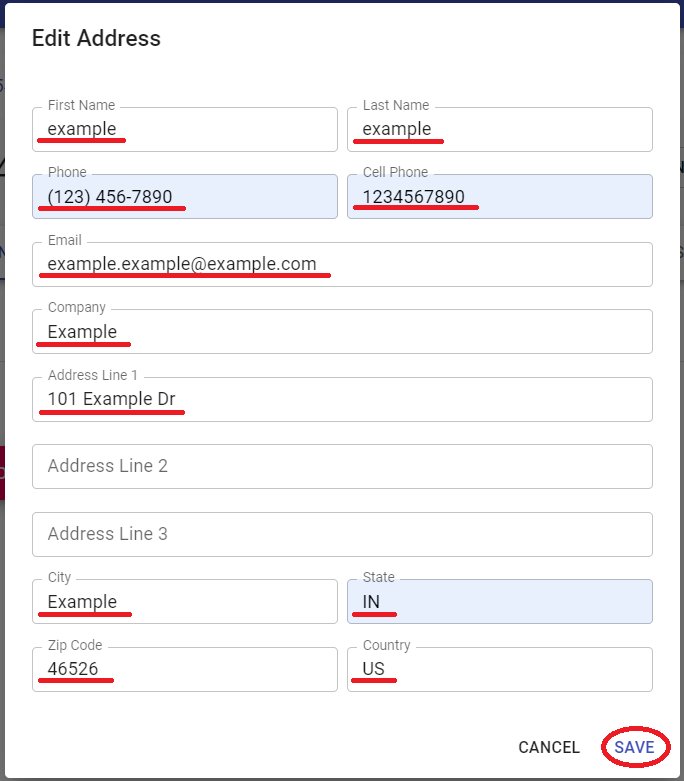
- Add needed information about the address and click on “SAVE” to save that address.
- Click on the “SHIPPING” tab.
- Editing an Address
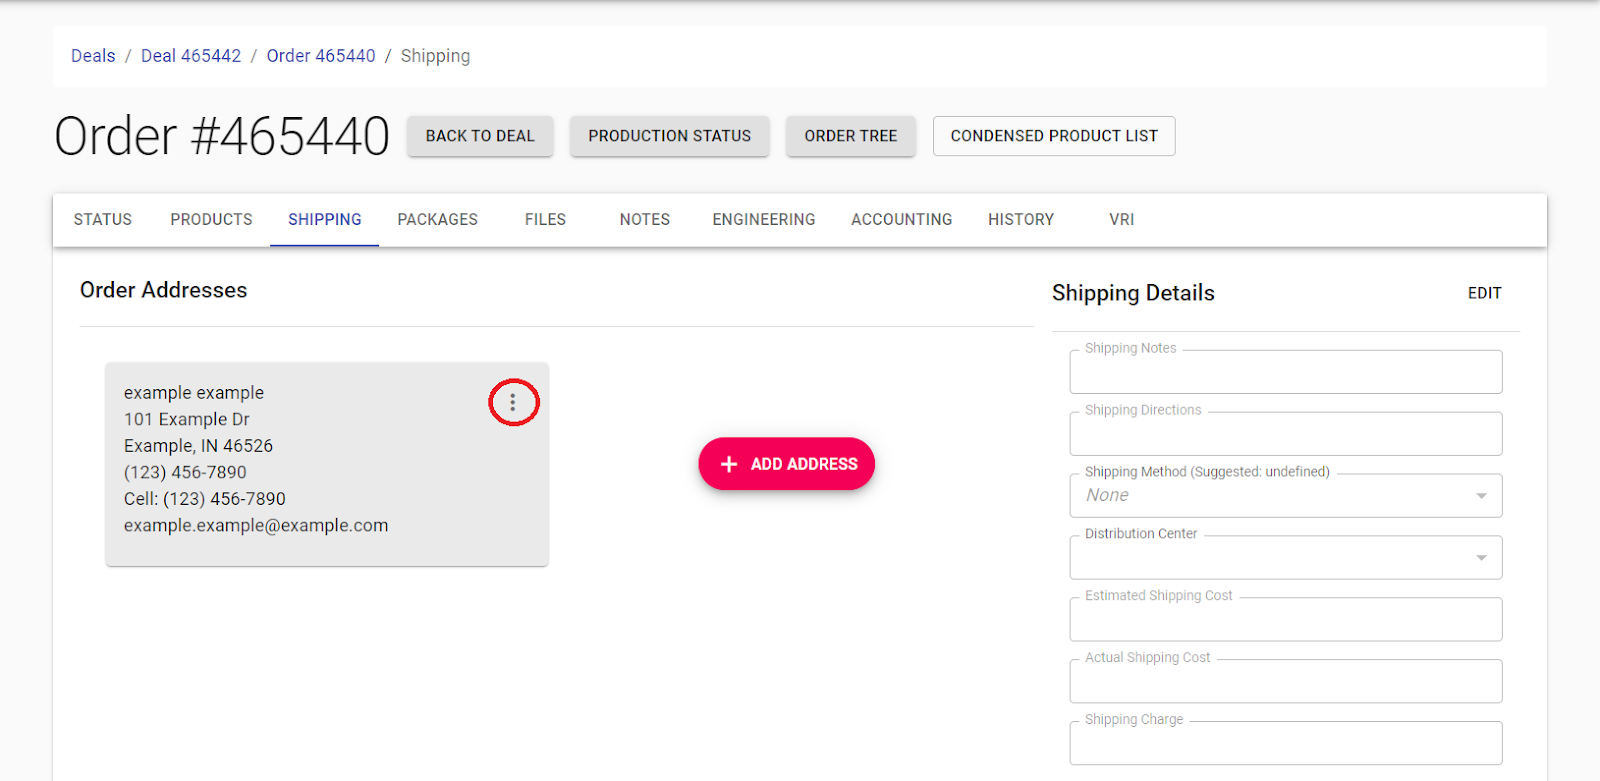
- Click on the three dots on the address you want to edit.
- Click on “Edit” to edit the address.
- Click on the three dots on the address you want to edit.
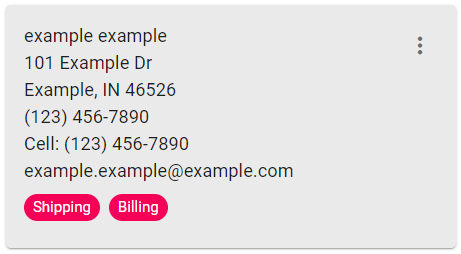
- Setting Address as Shipping or Billing
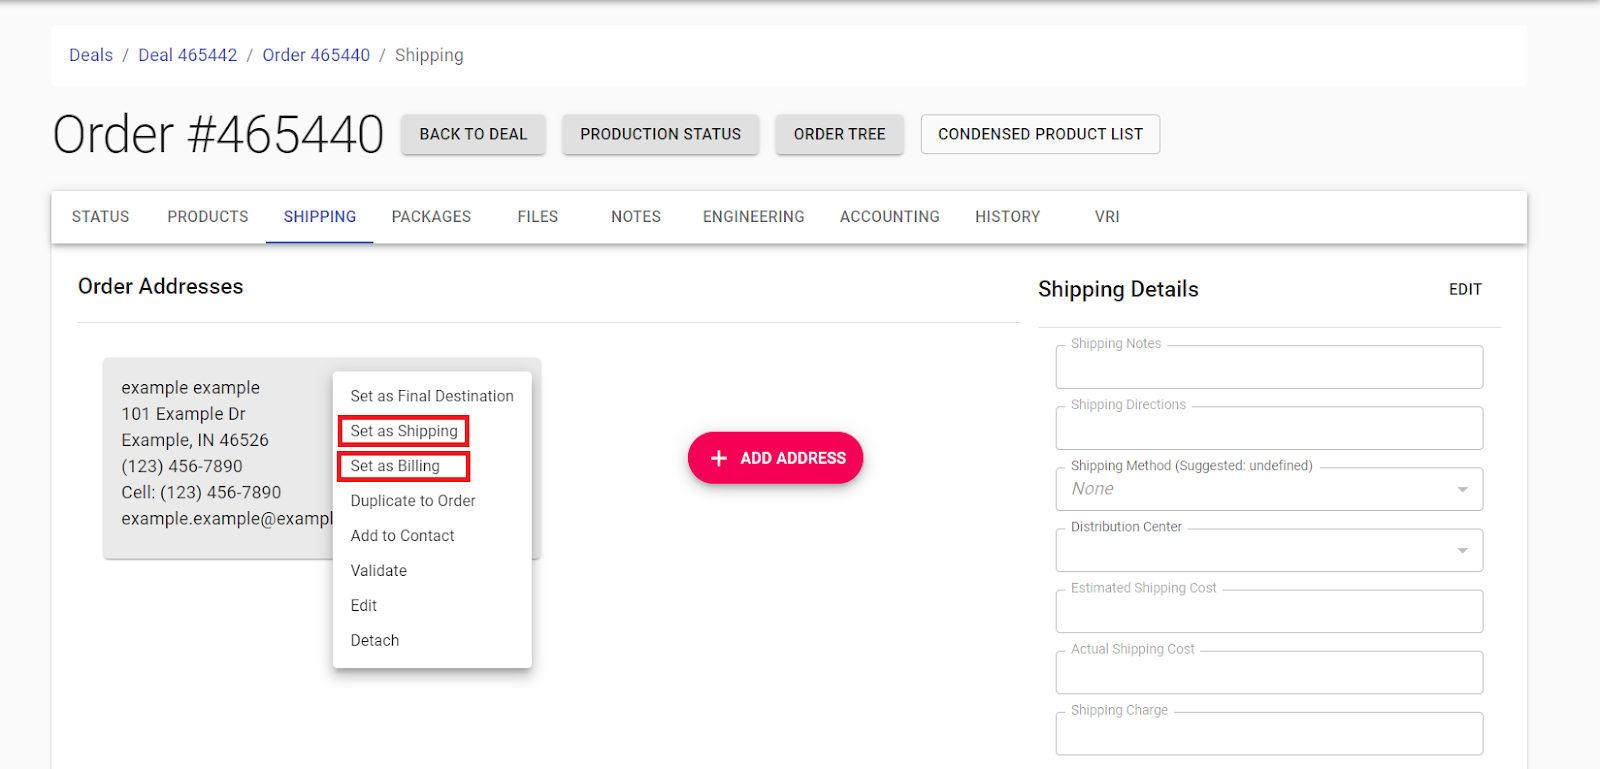
- Click on the three dots on the address you want to set as shipping or billing.
- Click on “Set as Shipping” or “Set as Billing” from the dropdown menu (once you click on it, the label is going to show, indicating the status of the address)
- Click on the three dots on the address you want to set as shipping or billing.
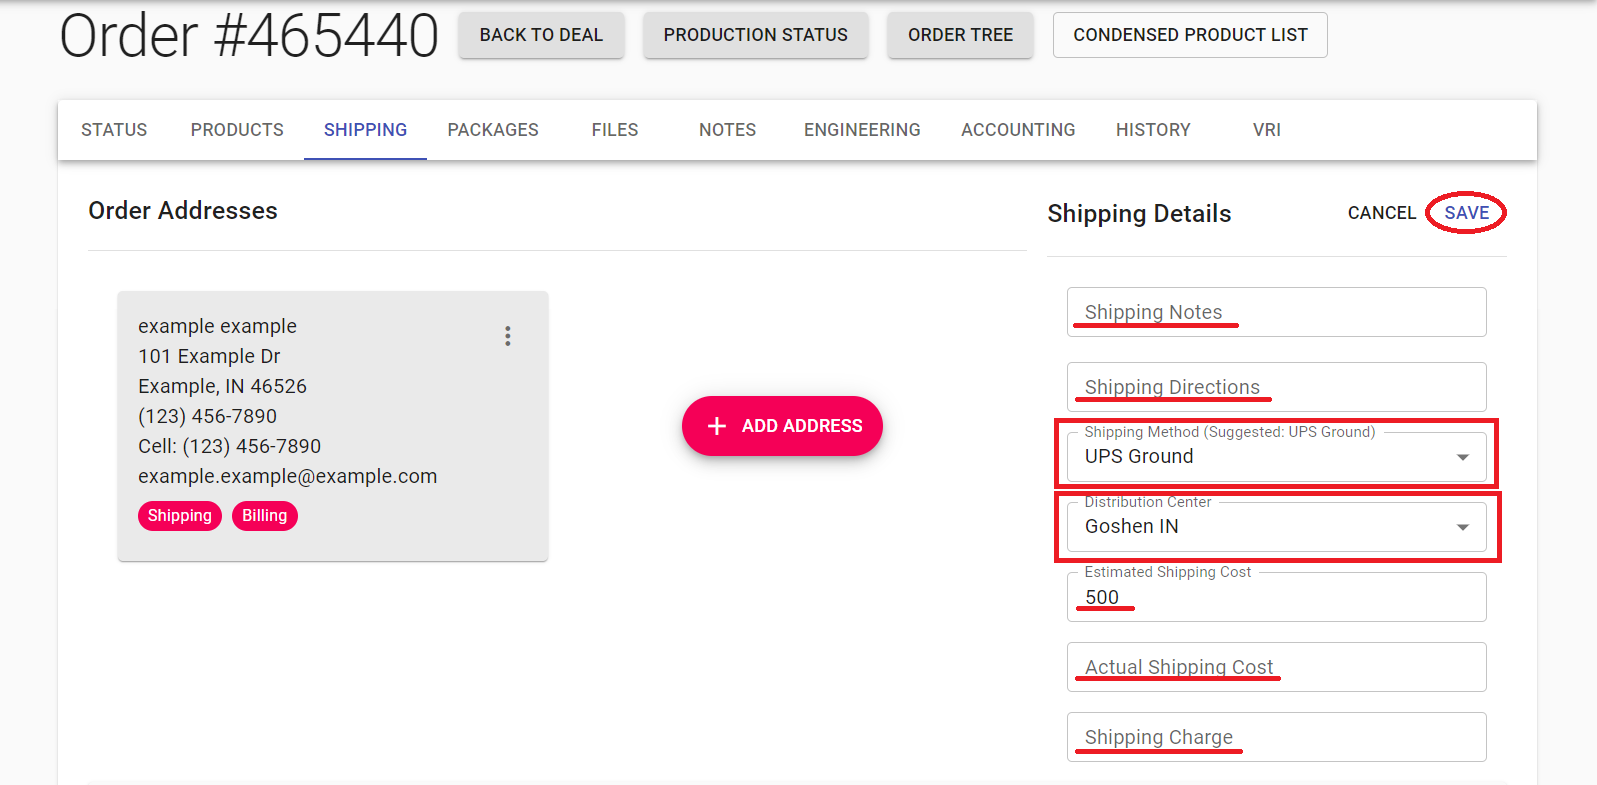
- Adding Shipping Details
- Click on “EDIT” next to the “Shipping Details” section.
- Add needed shipping information then click “SAVE” to save it.
- Click on “EDIT” next to the “Shipping Details” section.
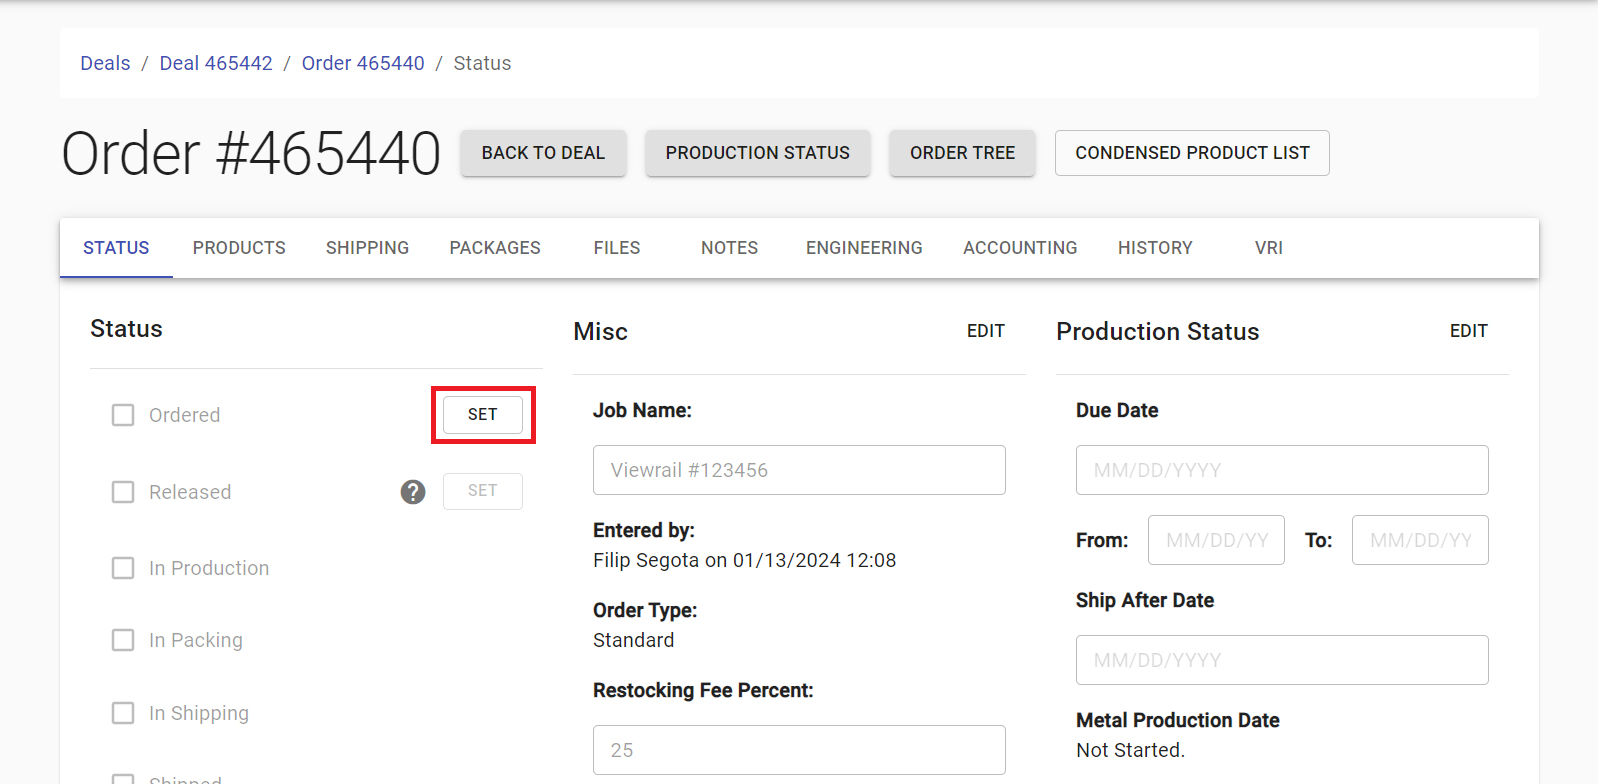
- Setting Order as "Ordered"
- Go back to the “STATUS” tab.
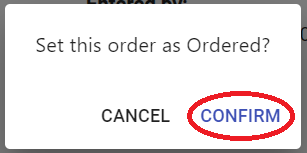
- Under the “Status” section, click on the “SET” button next to “Ordered”.
- Click on “CONFIRM” to confirm it as ordered.
- Go back to the “STATUS” tab.
- Adding Order's Team
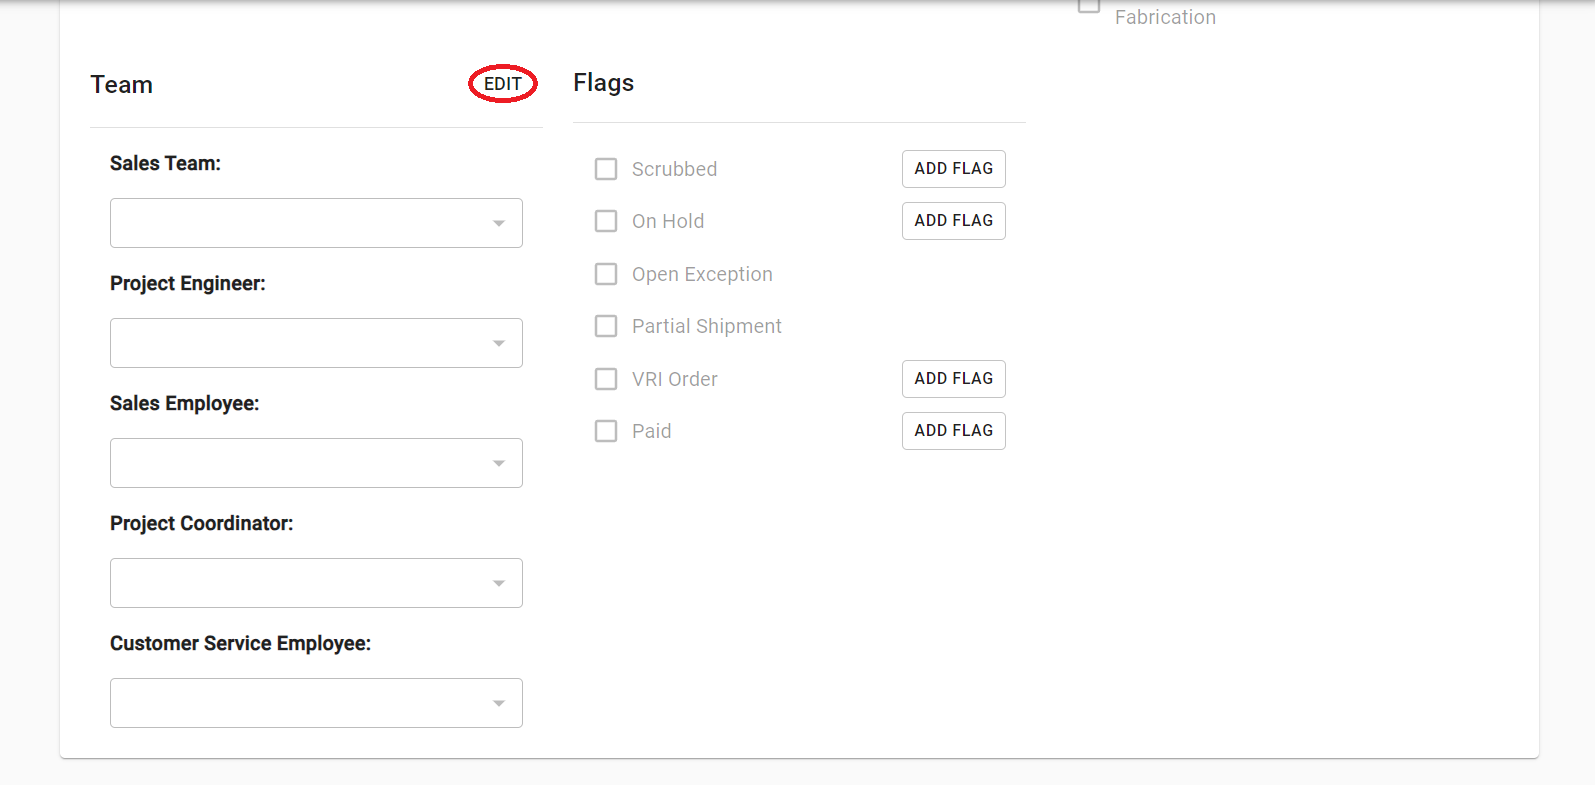
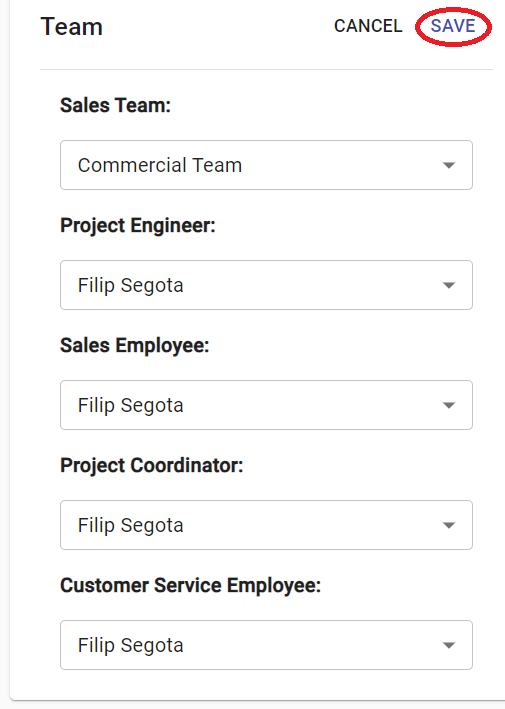
- Under the “STATUS” tab, scroll down to the “Team” section, and click on “EDIT” to set a specific team for that order.
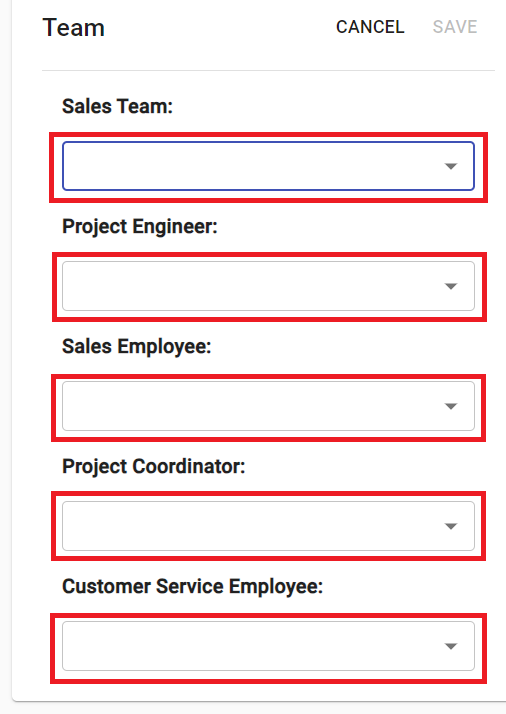
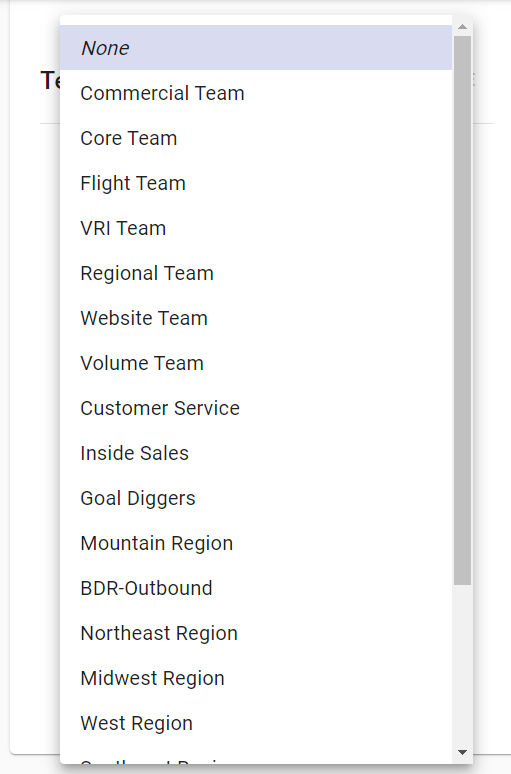
- Set up the specific team by clicking on the dropdown menus under team or role.
- Select the wanted team or person from the dropdown menu.
- Once you select everyone that you want, click on “SAVE” to save them.
- Under the “STATUS” tab, scroll down to the “Team” section, and click on “EDIT” to set a specific team for that order.
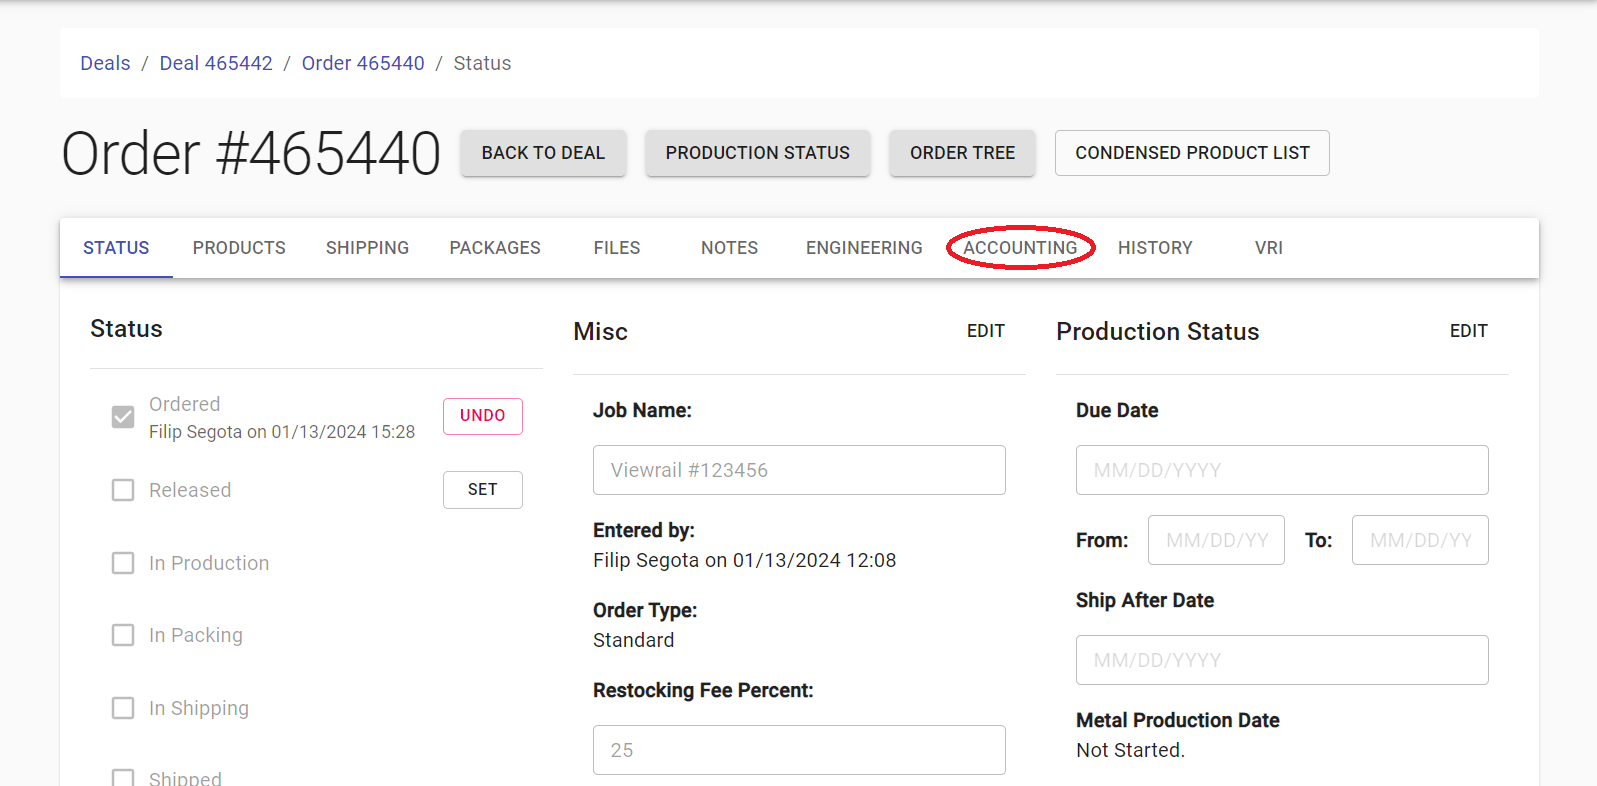
- Adding Accounting Information
Disclaimer: Only accounting is supposed to edit this tab! If you need to add a payment or a sale to the order, contact accounting at accounting@viewrail.com. If the payment was originally made in OD and it's not showing in the Terminal, contact accounting as well.
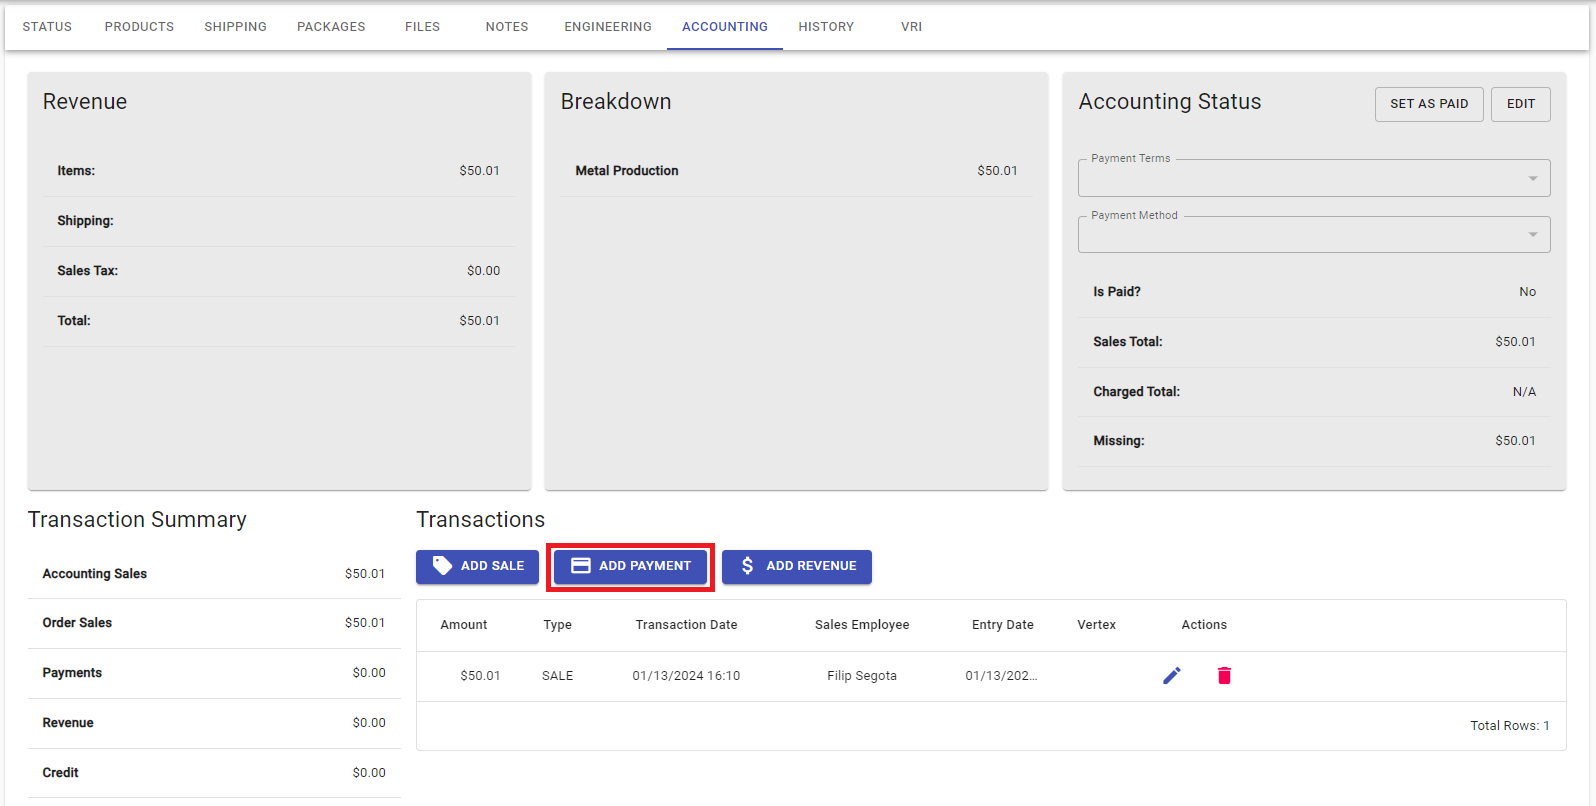
- Click on the “ACCOUNTING” tab.
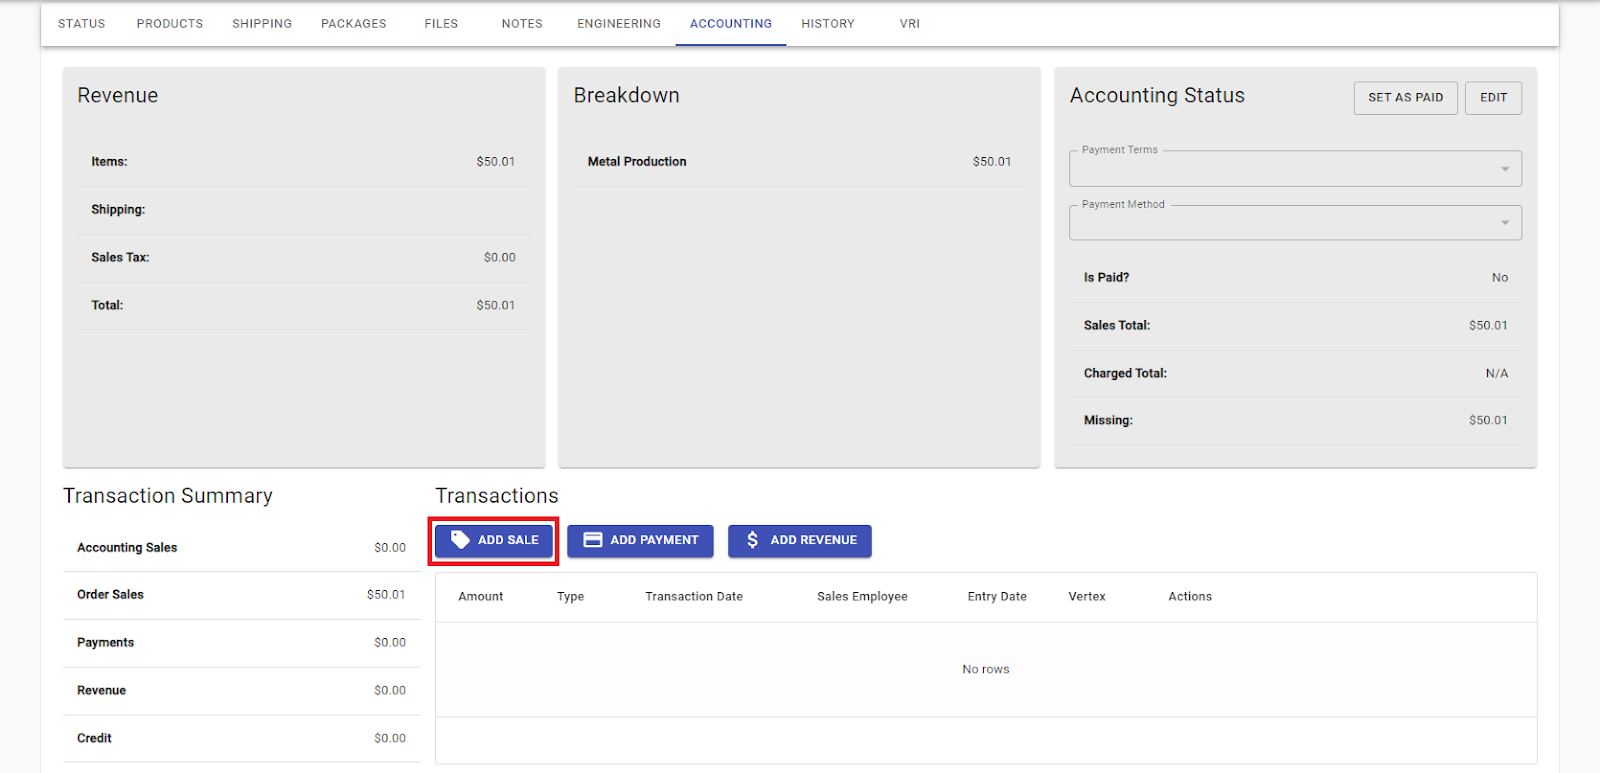
- Adding a Sale.
- Click on the “ADD SALE” button.
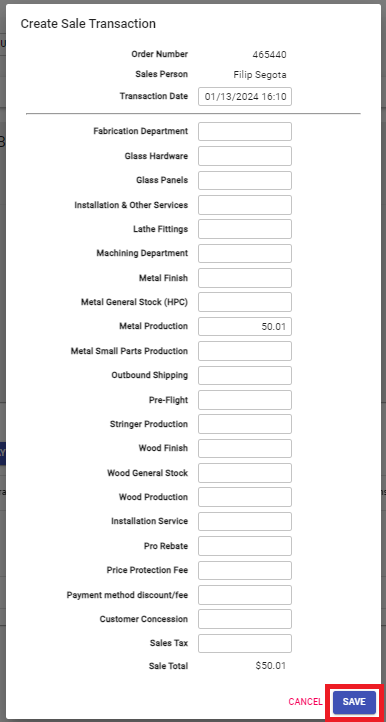
- Add needed sales information and click on the “SAVE” button to save that sale.
- Click on the “ADD SALE” button.
- Adding a Payment.
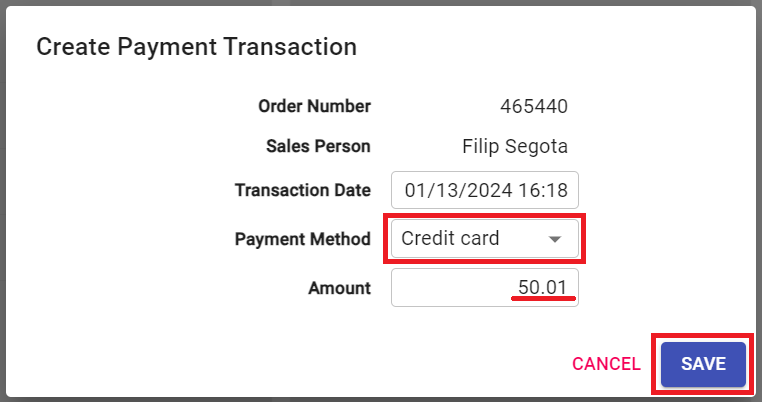
- Click on the “ADD PAYMENT” button.
- Add needed payment information - add a payment method by clicking on the dropdown menu and selecting one of the options, and input the amount of the payment - and click on the “SAVE” button to save that payment.
- Click on the “ADD PAYMENT” button.
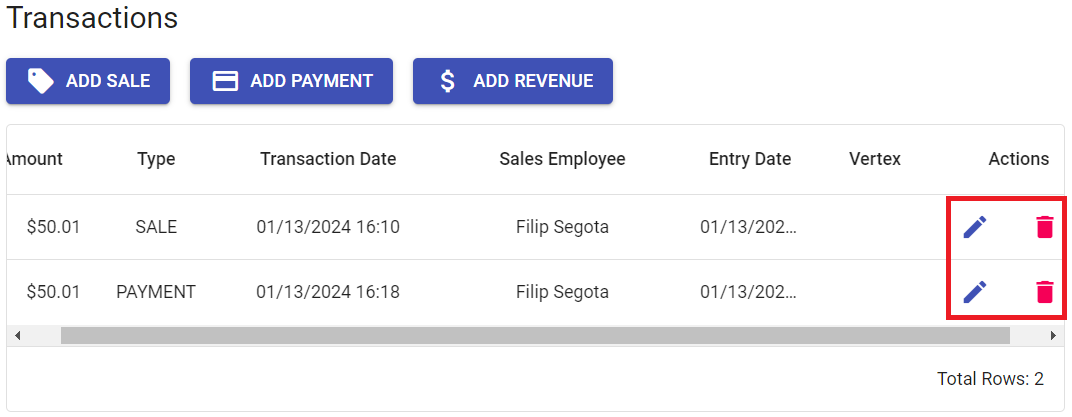
- Editing or Deleting Transactions.
- Under the “Transactions” section, you can see the list of all the added transactions. You can edit a transaction by clicking on the
icon, or delete a transaction by clicking on the
icon.
- Under the “Transactions” section, you can see the list of all the added transactions. You can edit a transaction by clicking on the
- Click on the “ACCOUNTING” tab.
English